How to Send a Wedding Sneak Peek the Next Morning (from Google Drive)
Which photos to choose, how many, a one-evening cull, export settings for phones, and how to send a sneak peek as a real gallery from a Google Drive folder, so the same link becomes the full wedding gallery later.
Short answer
Choose 15 to 40 edited frames that tell the day in miniature, export them at 2048 px in sRGB, put them in a "01 Sneak peek" subfolder of a Drive folder for the whole wedding, share it as Anyone with the link, and send it as a GalleryLink gallery the next morning. Add the full set to the same folder later and the same link becomes the full gallery.
The morning after a wedding, the couple wakes up, reaches for their phone and scrolls through a hundred blurry guest photos in the family chat. Somewhere in that scroll is the moment a sneak peek lands. Twenty-five properly edited frames, sent by the photographer before lunch, do more for how a couple remembers the day (and for how many people ask who shot it) than almost anything else you deliver.
The sneak peek is also the easiest delivery you will ever make, if the workflow is set up for it. This guide covers the whole thing: which photos to choose, a culling pass that fits into one evening, export settings for phones, and how to send the set as a proper gallery straight from a Google Drive folder, so the same link can grow into the full gallery weeks later.
- The short version
- Why the next morning matters
- How many photos, and which ones
- A culling pass that fits into one evening
- Export settings for phones
- Set up the Drive folder for the whole wedding
- Turn the folder into a gallery
- When to create it: the 24-hour window
- What to send with it (three messages to copy)
- Parents, grandparents and the QR card
- Adding a short highlight clip
- Instagram: before or after the couple?
- From sneak peek to full gallery
- Let their favourites guide your edit
- Seven mistakes worth avoiding
- Not only weddings
- What it costs
- The whole thing on one page
The short version
Pick 15 to 40 of the strongest frames, one or two from each part of the day. Give them a quick, consistent edit and export them at 2048 pixels on the long edge in sRGB. Put them in a subfolder called something like 01 Sneak peek inside a Drive folder for the whole wedding, and set the folder to "Anyone with the link". Paste that folder link into GalleryLink, choose a cover, write two lines to the couple, and send the gallery link with a short message. The whole thing takes 45 minutes to an hour once you have done it twice.
Later, when the full edit is finished, you add the rest of the wedding to the same Drive folder as new subfolders. The link you sent the morning after becomes the full gallery without anyone having to find a new one.
Why the next morning matters
It catches the moment. The day after a wedding, everyone involved is still thinking about it. Guests are posting their own photos, relatives are asking each other if anyone got a good one of the cake, and the couple is replaying the day. A gallery that arrives then gets opened, shared and talked about. The same gallery arriving three weeks later is pleasant; arriving the next morning, it becomes part of the story of the day.
It buys you time for the full edit. Full wedding galleries take weeks, and every week of silence makes a couple a little more anxious. A good sneak peek resets that clock. Couples who have already seen two dozen beautiful frames are much more patient about the remaining six hundred. (If you are not sure what a reasonable turnaround is, we wrote about how long wedding photos usually take.)
It is your best marketing. The sneak peek is the first time the couple's friends and family see your work attached to a day they were part of. Every share in a family chat is a recommendation with a photo attached. Most wedding referrals start with "who was your photographer?", and the sneak peek is often when that question gets asked.
It shows the couple you were paying attention. A carefully chosen set says "I saw the moments that mattered to you". A rushed dump of thirty similar portraits says the opposite. The selection matters more than the speed, which is why most of this guide is about choosing.
How many photos, and which ones
There is no correct number, but there is a useful range. Fewer than ten feels like a teaser for a teaser. More than about fifty stops feeling like a highlight and starts feeling like an unfinished gallery, and it puts pressure on your editing time the night after a twelve-hour day. Most photographers settle somewhere between 15 and 40.
Think of the sneak peek as the day told in miniature. One strong frame from each chapter beats ten from the portrait session. A simple shape that works for most weddings:
- Getting ready (2 to 4): one detail (dress, rings, shoes, invitation), one real moment (a parent helping with buttons, a laugh in the mirror).
- First look or arrival (1 to 3): the reaction, not the set-up.
- Ceremony (3 to 6): the walk in, the vows, the first kiss, one wide that shows the place.
- Family and group (1 to 2): just one or two. Parents look for these first.
- Couple portraits (4 to 10): your strongest work, with variety: close, wide, one with the landscape or the venue.
- Reception (3 to 8): speeches with reactions, the first dance, the dance floor at its fullest, one detail of the room.
- The ending (1 to 2): the exit, the sparklers, the last quiet moment.
Here is how that scales:
| Set size | When it fits | Roughly |
|---|---|---|
| 15 frames | Smaller weddings, elopements, or when you are shooting again the next day | 2 prep, 3 ceremony, 1 family, 5 portraits, 3 reception, 1 ending |
| 25 frames | Most full-day weddings | 3 prep, 2 first look, 5 ceremony, 2 family, 7 portraits, 5 reception, 1 ending |
| 40 frames | Multi-day or very large weddings, or couples who paid for a next-day preview | 4 per chapter, with more portraits and reception |
What to leave out. Anything you are not completely sure of: a soft focus, a closed eye, a frame that needs real retouching. Near-duplicates: if two portraits are almost the same, send the better one and save the other for the full gallery. And anything that might surprise someone in a bad way, such as an unflattering candid of a guest or a moment the couple may not want circulated the next morning. The sneak peek gets forwarded. Choose as if the grandparents will see every frame, because they will.
Put the best one first. The first image is the cover, the thumbnail in the chat and often the only one some relatives look at closely. Pick it deliberately. It is usually a couple portrait with emotion in it rather than the most technically perfect frame.
A culling pass that fits into one evening
The night after a wedding you are tired, the cards are full, and the full cull is a job for another week. The sneak peek cull is a different, much smaller job: you are not judging every frame, you are hunting for the best handful. Treat it that way.
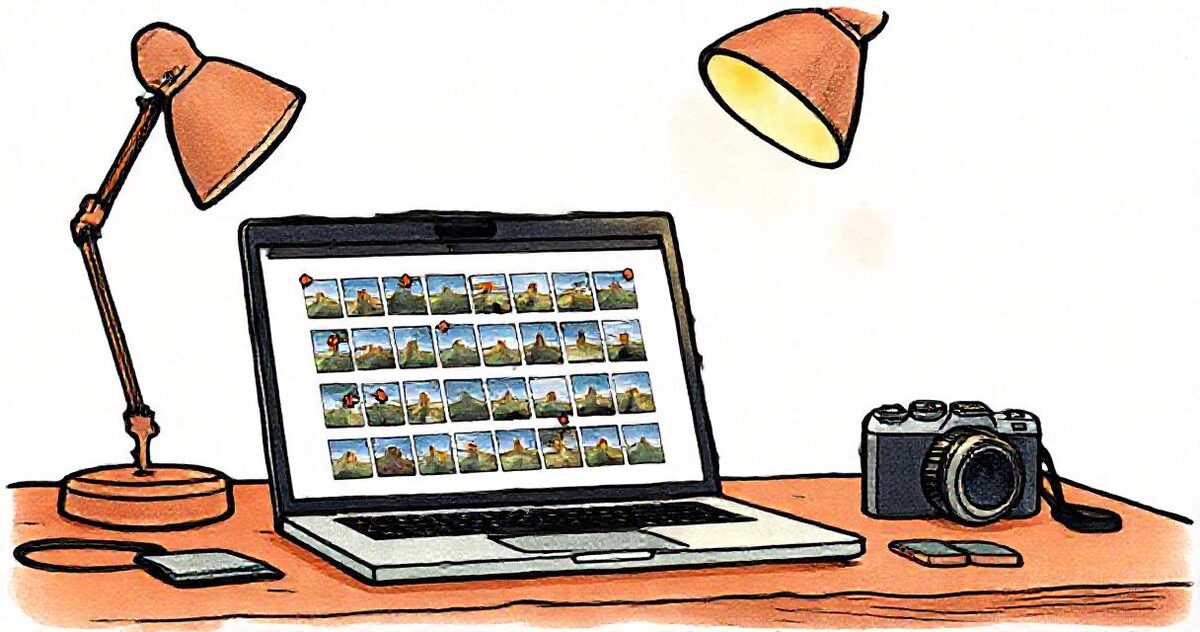
In Lightroom Classic, one fast way to do it:
- Back up first. Copy the cards to two places before you touch anything. Nothing in this guide is worth risking the originals for. (Our backup workflow guide covers a simple setup.)
- Import with smart previews or standard previews so scrolling is quick.
- Do one quick pass in the Library grid, chapter by chapter, and press
Pon anything that jumps out. Do not stop to compare. If you hesitate, skip it. Aim for roughly twice as many picks as you need. - Filter to flagged and do a second pass in Survey or Loupe view, cutting down to your final number. This is where you remove near-duplicates and balance the chapters.
- Add the survivors to a collection called "Sneak peek". You will use it again later to make sure these frames get the same treatment in the full edit.
If you cull in Photo Mechanic, Narrative Select, Aftershoot or another tool first, the idea is the same: a fast pass for standouts, a second pass for balance, then only the final set goes into editing.
Edit for consistency, not perfection. Apply your usual preset, fix exposure and white balance per scene, straighten, crop, and do any quick spot removal that a phone screen would show. Leave the deep retouching for the full gallery. The one thing the sneak peek must have is a consistent look, because it sets the couple's expectation of the full gallery. If you plan to change the grade later, do not send a sneak peek in a different style.
Export settings for phones
Almost everyone will open the sneak peek on a phone, many of them on mobile data. Full-resolution 40 MB files are the wrong choice here. Sensible settings:
| Setting | Value | Why |
|---|---|---|
| Format | JPEG | Opens everywhere, including older phones and in-app browsers |
| Colour space | sRGB | Adobe RGB and ProPhoto look washed out on most screens |
| Long edge | 2048 px | Sharp on any phone and on most laptops, small enough to load quickly |
| Quality | 80 to 85 | Visually identical to 100 at a fraction of the size |
| Sharpening | Screen, standard | Compensates for the downsizing |
| Metadata | Copyright and contact only | Drops camera serial numbers and location data. See removing location from photos |
| File names | Sequence, e.g. 01, 02, 03 | Keeps your chosen order when the folder is read |
Each file should come out at roughly 0.5 to 1.5 MB. A 25-frame sneak peek is then around 25 MB in total, which opens comfortably on a phone. Save this as an export preset called "Sneak peek" so next time it is one click.
The file names matter more than they look. GalleryLink shows a folder's files in natural name order, so 01 through 25 display exactly in the order you chose, with your cover choice first. If you export with the original camera names (DSC_4417.jpg), the order follows the camera counter instead of your story. If you use two cameras, that can scramble the order completely.
If couples might want to print or post at higher resolution later, that is what the full gallery is for. The sneak peek is about looking good on a phone today.
Set up the Drive folder for the whole wedding
This is the one decision that makes everything later easier. Instead of a folder just for the sneak peek, create a folder for the whole wedding and put the sneak peek inside it as the first subfolder:
Emma & Josh – 11 October 2026/
  01 Sneak peek/
     01.jpg … 25.jpg
Later, the full gallery goes into the same parent folder:
Emma & Josh – 11 October 2026/
  01 Sneak peek/
  02 Getting ready/
  03 Ceremony/
  04 Family/
  05 Portraits/
  06 Reception/
GalleryLink turns each subfolder into a section of the gallery, sorted by name, which is why the number prefixes are there. The sneak peek stays at the top as a "best of", and the full story follows underneath it.
Upload the exported JPEGs with Drive in your browser or the Drive desktop app. Either keeps the original file. If you have seen photos look soft after uploading, our guide to uploading to Drive without losing quality explains why that happens and how to avoid it.
Then share the parent folder:
- Right-click the wedding folder and choose Share.
- Under General access, change "Restricted" to Anyone with the link, with the role set to Viewer.
- Click Copy link.
Sharing the parent folder covers every subfolder you add later, so you only do this once per wedding. Viewer access means nobody can change or delete anything in your Drive. If a client has ever told you a Drive link "doesn't work", it is almost always step 2. We explained the common causes in Google Drive link not working for your client.
Turn the folder into a gallery
A raw Drive link opens on a file manager: grey toolbar, file names, a sign-in prompt for some people, and photos that play as a slideshow one file at a time. For a couple's first look at their wedding, that is a poor frame. A gallery shows the same files as a full-screen photo grid that opens instantly on any phone, with no app and no Google account.
In GalleryLink:
- Paste the folder link on the create screen. GalleryLink reads the folder straight away and tells you how many photos it found. If it finds none, it says why (usually the sharing setting) and points to the fix.
- Name the gallery after the couple: "Emma & Josh". This name appears at the top of the gallery and in the link preview in chats.
- Choose the cover: the frame you picked as your opener. It is the first thing people see and the image used when the link is shared in a chat.
- Write a short welcome note in the description. Two lines is enough: what this is, and when the rest is coming. For example: "A first look at your day while we work on the rest. Your full gallery will be here by 20 November."
- Pick a look. Editorial and Minimal suit most weddings, with Masonry for mixed portrait and landscape frames or Grid for a calmer, even layout. Our post on masonry vs grid layouts compares them.
- Leave downloads on unless you have a reason not to. Couples want to post these, and a sneak peek they cannot save gets screenshotted instead, at a worse quality.
Because the gallery reads the folder live, any change you make in Drive (a swapped frame, a fixed crop, a new subfolder) shows up in the gallery without creating anything again. If you replace a file, keep the same name so it stays in the same position.
When to create it: the 24-hour window
On the free plan, a gallery can be shared free for 24 hours. The window starts when the gallery is created, not when you send it, so the order matters:
- Do the cull, edit, export and upload the night before, or whenever suits you.
- Create the gallery when you are ready to send it, ideally the next morning. A gallery created at midnight that is sent at 10am has already lost ten of its hours.
- Send it at a time the couple will be awake to enjoy it. Late morning the day after works well: they have slept, and the family chat is active.
Free galleries also show a small "Made with GalleryLink" badge. When the 24 hours are up, the gallery closes for visitors (nothing is deleted, and you still see everything), and you can keep it online with a one-off $10 or with Pro, which keeps every gallery online and removes our branding. If you already plan to turn the sneak peek into the full gallery on the same link, which we recommend below, that is the point to decide.
What to send with it (three messages to copy)
The link on its own works, but a short message turns a delivery into a moment. Keep it warm and brief, say what it is, and say when the rest is coming. Three versions to adapt:
WhatsApp or text, the morning after:
Good morning, you two! I couldn't wait, so here's a little first look at yesterday: [link]. Grab a coffee and enjoy. The full gallery will be with you by [date]. It was a joy to be there. ❤️
Email, a little more formal:
Subject: A first look at your wedding day
Hi Emma and Josh,
Thank you again for having us yesterday. While we work through the full set, here are some of our favourite moments from the day: [link]
The gallery opens on any phone or computer, and you can save any photo you like. Your full gallery will be ready by [date], at the same link.
Warmly, [name]
Instagram DM, if that is where you talk:
Your sneak peek is ready! [link]. Feel free to share and post anything you love, and if you do, a tag means the world to us. Full gallery coming [date].
A few details that help:
- Give a date for the full gallery, not "soon". A concrete date stops the "any news?" messages before they start.
- Ask for the tag once, gently. Most couples are happy to, and many simply do not think of it.
- Send it to the couple first. Let them be the ones to share it with family. It is their day, and it makes them the bearers of good news.
Parents, grandparents and the QR card
The couple will forward the link, and that is fine: the gallery opens for anyone with the link, on any phone, without an account. The people it helps most are the ones who would struggle with a Drive folder: grandparents, older relatives, anyone who does not use Google.

When a gallery is ready, GalleryLink also makes a QR card for it, with the cover photo in the centre of the code. Some photographers print a few and drop them at the parents' house, or send the image so the couple can print it themselves. For relatives who will never find a link in a busy family chat, pointing a phone camera at a card on the kitchen table just works. The same card is useful for the full gallery later, because the link does not change.
Adding a short highlight clip
If you shoot video, or a second shooter grabbed some phone clips, a 30 to 60 second highlight in the sneak peek is a lovely touch. Put the clip in the same 01 Sneak peek subfolder. Drive videos show up in the gallery alongside the photos and play in the viewer.
Keep it short and export it at a phone-friendly size (1080p, H.264, MP4). A three-minute 4K file will be slow to start for anyone on mobile data, and the photos are the point here. Name it so it sorts where you want it, for example 00 Highlight.mp4 to appear before the photos, or 99 Highlight.mp4 to close the set.
Instagram: before or after the couple?
Always after. Let the couple see their photos before the internet does. A good rule is to post your own sneak peek on Instagram only once the couple has opened the gallery, or at least a few hours after you have sent it, and to ask them if there is anything they would rather you did not post.
When you do post, a carousel of 5 to 10 frames from the sneak peek, sized at 1080 × 1350 (4:5 portrait), takes up the most space in the feed. Our Instagram sizes guide lists every format, and the free carousel splitter turns a wide panorama of the venue into a seamless swipe. Tag the couple, the venue and any suppliers they loved. Suppliers often reshare, and they are a steady source of referrals.
From sneak peek to full gallery
This is where the folder structure from earlier pays off. When the full edit is done:
- Export the full set into new numbered subfolders in the same wedding folder:
02 Getting ready,03 Ceremony, and so on. - The gallery picks them up as new sections, in order, under the sneak peek. There is nothing to rebuild.
- Update the welcome note to say the full gallery is here.
- Send a short message on the same thread: "Your full gallery is ready, at the same link as before."
The couple does not have to find a new link, and every relative who saved the sneak peek link now has the full wedding. Some photographers like to rename 01 Sneak peek to 01 Highlights at this point, so it reads as a "best of" chapter rather than an early preview.
For the sneak peek link to still work weeks later, the gallery needs to stay online past the free 24 hours: with Pro, every gallery stays online for as long as you keep it; on the free plan, $10 keeps that one gallery. If you would rather keep the two separate (for example, a public sneak peek and a password-protected full gallery), that works too. Make a second gallery from a second folder and send it as its own delivery. Password-protected galleries are part of Pro.
Let their favourites guide your edit
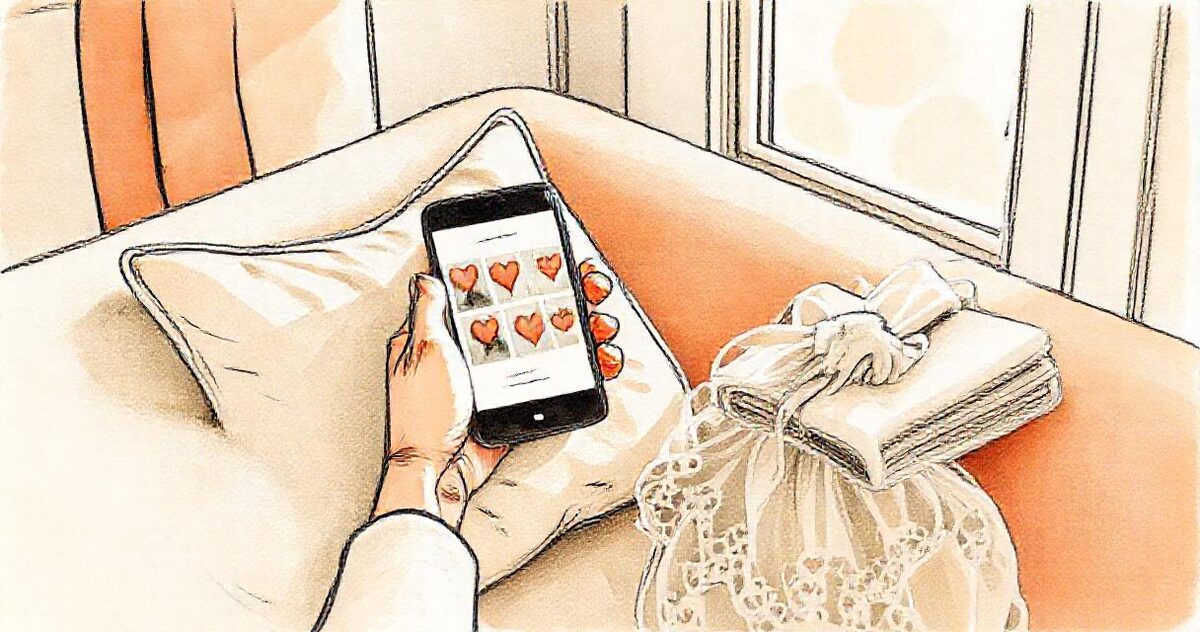
Visitors can tap a heart on any photo in the gallery to keep their favourites together. On a sneak peek, those hearts are useful information. If the couple hearts every candid with the grandparents and none of the posed portraits, that tells you where to spend your retouching time on the full set, and which moments to look for when you cull the rest. A couple who hearts the dance floor shots will probably want more of the reception than you planned to deliver.
It also gives you an easy reason to check in: "I saw you loved the one by the window. There are a few more from that moment coming in the full set." That kind of message makes the wait feel shorter.
If you offer albums or prints, the full gallery can do more: with Pro, clients can send you a selection of photos with a note, which works well for album picks. We covered that workflow in letting clients choose their favourite photos.
Seven mistakes worth avoiding
- Sending too many. Eighty frames the next morning is not a sneak peek, and it makes the full gallery feel like a repeat. Keep it tight.
- A different look from the full gallery. If the sneak peek is warm and film-like and the full gallery is cool and clean, the couple will notice and wonder which one is "real". Edit both with the same base.
- A folder still set to Restricted. The couple sees "You need access" and you get a message at 8am. Check by opening the link in a private browser window before sending.
- Full-size files. Twenty-five 40 MB files on 4G is a gallery that never quite finishes loading. Export at 2048 px.
- Camera file names.
DSC_4417andIMG_0832from two bodies interleave in the wrong order. Rename on export. - Creating the gallery the night before. On the free plan the 24 hours start at creation, so a gallery made at midnight loses half its life while everyone sleeps.
- No date for the full gallery. "Coming soon" invites a stream of anxious check-ins. A date, even a cautious one, gives everyone peace of mind.
Not only weddings
The same workflow fits any job where people are waiting:
- Events and conferences: a same-evening set of 20 frames for the organiser's social posts, then the full set later. See same-day event photo delivery.
- Sports: a handful of action shots to the team or club that night. Our same-day sports gallery guide goes into more detail.
- Family and newborn sessions: five or six favourites the next day keep families excited while you edit the rest.
- Multi-day weddings: a sneak peek per day, each as its own subfolder, which works especially well for multi-day Indian weddings.
What it costs
- Google Drive: 15 GB free with any Google account, or Google One storage if you already pay for it. A sneak peek at these export settings is around 25 MB, so it barely registers.
- GalleryLink Free: one gallery, shared free for 24 hours with a small "Made with GalleryLink" badge. Enough to send a sneak peek and see how couples respond.
- $10 once: keeps that one gallery online, so the same link can become the full gallery.
- Pro, $5 a month or $50 a year: unlimited galleries that stay online, no GalleryLink branding, every theme and layout, password protection, gallery stats, client selections, download-all ZIP for Drive galleries (beta) and your own studio website. Details on the pricing page.
If you shoot more than one wedding a season, Pro costs less than one $10 keep per wedding, and every sneak peek link keeps working into the full gallery.
The whole thing on one page
- Back up the cards to two places.
- Do a fast pass for standouts, then a second pass to balance the chapters: 15 to 40 frames.
- Edit for a consistent look that matches the full gallery you will deliver.
- Export JPEG, sRGB, 2048 px long edge, quality 80 to 85, renamed
01,02,03. - Create a Drive folder for the whole wedding with a
01 Sneak peeksubfolder, and upload. - Share the parent folder: Anyone with the link, Viewer. Test it in a private window.
- The next morning, paste the link into GalleryLink, name it after the couple, choose the cover and write two lines.
- Send it to the couple first, with a date for the full gallery and a gentle ask for a tag.
- Post on Instagram only after they have seen it, and check the hearts to see what they loved.
- When the full edit is done, add numbered subfolders to the same folder and tell them it is ready at the same link.
The sneak peek is a small amount of work for an outsized return: a happier couple, a calmer wait for the full gallery, and your photos in front of everyone who was there, the morning after. If you would like to try it on your next wedding, you can create a free GalleryLink account and paste your folder link in under a minute.